Installing the Best Android Dev Environment: Intellij IDEA + Genymotion Emulator
Every few months I check out new build tools. When I first began building Android apps, I used Google's Android Toolkit, Eclipse and Google's Emulators. Pretty quickly, I grew impatient with Google excruciatingly slow emulator and switch to always deploy to my device.
Then I started using VirtualBox based emulators, switched from Eclipse to Intellij IDEA, and finally switched to using Genymotion's emulator. So here are the steps necessary to setup your Mac and the links to where to find everything.
I will be posting a video of these instructions to YouTube in about a week. I have a lot of editing to do to take about three hours of video to about 10 minutes.
Installing the complete Android development kit is going to take about two hours, possibly more. I highly recommend that you do it all in one sitting, to avoid accidentally re-installing an installed component or even worse not installing a component. We are going to need five components:
- Oracle's Java Development Kit (JDK)
- Android Developer's Toolkit (ADT)
- JetBrains' Intellij IDEA Community Edition
- Oracle's VirtualBox
- Genymotion Android Emulator
JDK
There is a bit of disagreement about which version of the JDK to use for Android development. The current version of Java, at the time of writing, is JDK 7. JDK 8 is currently in beta. But the Android developer's official page list JDK 6 as the version to use. Until the developer's page changes, I am going to recommend that we use JDK 6. Here is the link to that version on Apple's developer website. You will need to be registered as a developer in order to access this page.
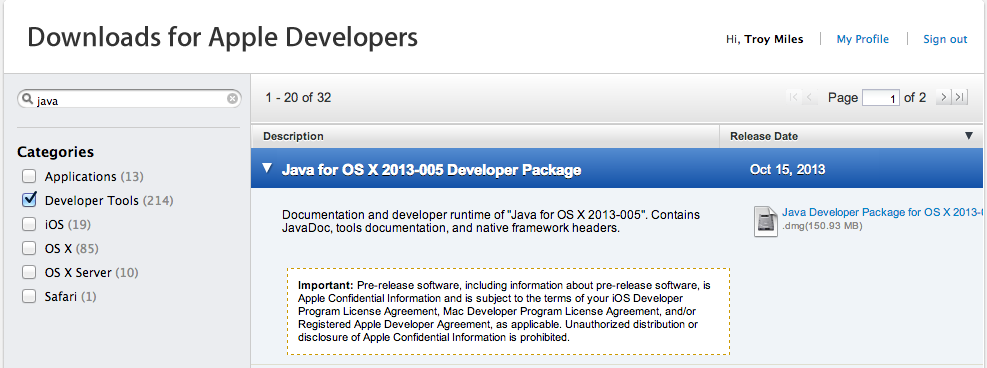
In Categories, clear everything except Developer Tools and use "java" as the search term. Don't use JDK 7 or 8. I have never been able to get them to work correctly. If you do so, you will have to clean up your dev box on your own. Select the version labeled, "Java for OS X 2013-005 Developer Package". Be sure that this is your version. There are others with really close names, but close is not good enough. Click the disclosure arrow to expand it. Click the Java Developer Package… link on the right hand side to download the .dmg file. Once it has finished downloading, double click the .dmg file to open it, then double click the JavaDeveloper.pkg file to start the install.
To validate the installation we need to use the Terminal. Open a Terminal window and type:
javac -version
It should respond with: javac 1.6.0_65. If it does you are good to go. If it doesn't STOP, don't go any further we need to fix it before we do anything else.
Troubleshooting
There are two issue that I am aware of that can cause issues. There are probably more but I haven't encounter them yet, so I can't help you with them.
Issue number one: You have another version of Java installed
If the response is: javac 1.7.0_45 or some other version number, you have another version of the JDK installed. First thing we need to do is verify that you have version 6 installed. From the terminal type:
cd /Library/Java/JavaVirtualMachines return
ls return
The ls command is the roughly the same as the dir command on a Windows machine. We should see 1.6.0_65-b14-462.jdk listed. If so, we just need to add a JAVA_HOME to our profile. If we don't see 1.6.0_65-b14-462.jdk listed, we didn't install it correctly. I suggest trying the install again.
Issue number two: We need to add JAVA_HOME
JAVA_HOME informs all tools looking for the JDK where it lives. To add we once again need to go to Terminal. From the command line enter:
vim ~/.bash_profile
vim is a text editor from the dawn of time. It has a funky UI, which is a bit hard to grok, but luckily all we need to do is add one line and save it. Enter the following line:
export JAVA_HOME="/Library/Java/JavaVirtualMachines/1.6.0_65-b14-462.jdk/Contents/Home/"
Then press escape XX, which is the escape key followed by shift X shift X. This will save our change and exit vim. Our profile should now point JAVA_HOME to our newly installed JDK 6. At this point I usually restart my machine to make sure all of my change get picked up, but I have been told all you need to do is log out then back in again.
ADT
Since we don't want to use Eclipse, all we need to download is the Android Developer Tools, not the ADT Bundle. Just the ADT.
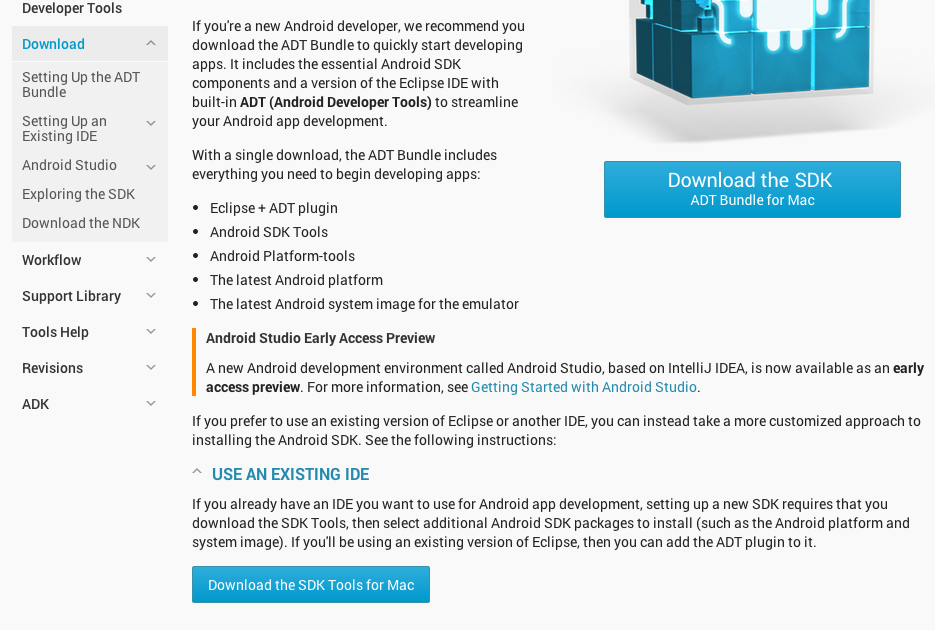
In your browser go to: http://developer.android.com/sdk/index.html
Scroll down to the bottom of the page.
Click the expando, "USE AN EXISTING IDE"
Click the button, Download the SDK Tools for Mac
The folder, "android-sdk-macosx, will download load to your machine, I recommend copying it to your application folder since most of the contents in it are executables. Once you have copied the folder to your applications folder you will need to run the app "android" in order to install SDK and other tools that you need. You will need to override OS X's security setting in order to run the android app. Find it using the finder, then hold down the control key while double clicking the app name. A security warning will pop up. Don't freak out. This is to be expected. Confirm that you want to run the android app. In a couple of seconds, the Android SDK installer program will appear.
For now only install Android SDK 19, or whatever the latest version is. Each version is kind of big and we don't want to spend all day installing SDKs we don't need. Besides it is pretty easy to add more SDKs later.
Intellij IDEA
We are finally ready to install the actual IDE. Use your browser to go to:
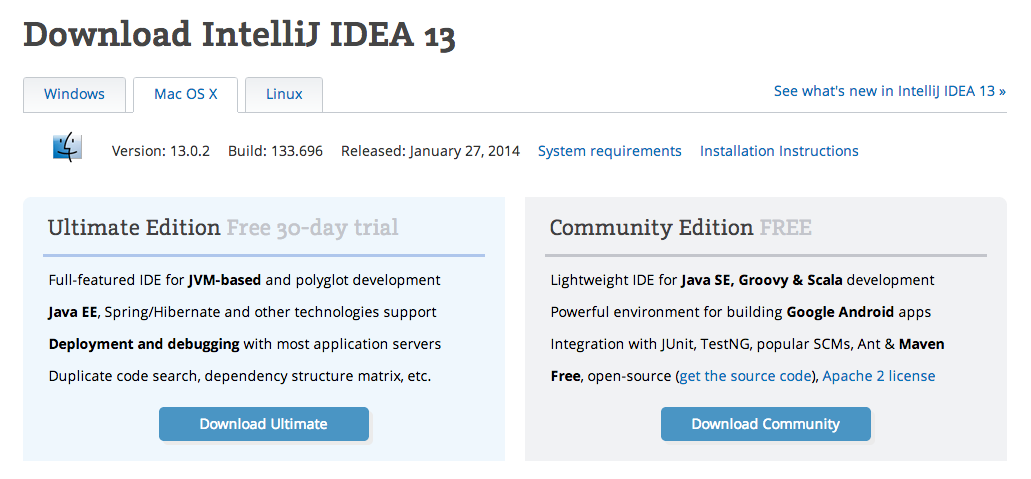
Click the button to download the Community Edition. It will take a few minutes to download the .dmg file.
Launch Intellij in order to finish the installation. Once the Welcome menu shows:
Double click Create New Project
Select Application Module from the Android section on the left side
We need to configure both the JDK 6 and our Android SDK
Click the New… button in the upper right hand corner
First we will configure the JDK
In the file finder dialog box navigate to:
/Library/Java/JavaVirtualMachines/1.6.0_65-b14-462.jdk/Contents/Home
Click Choose
Click the New… button again. Now lets find our android SDK folder.
In the file finder dialog box navigate to:
/Applications/android-sdk-macosx
Click Choose
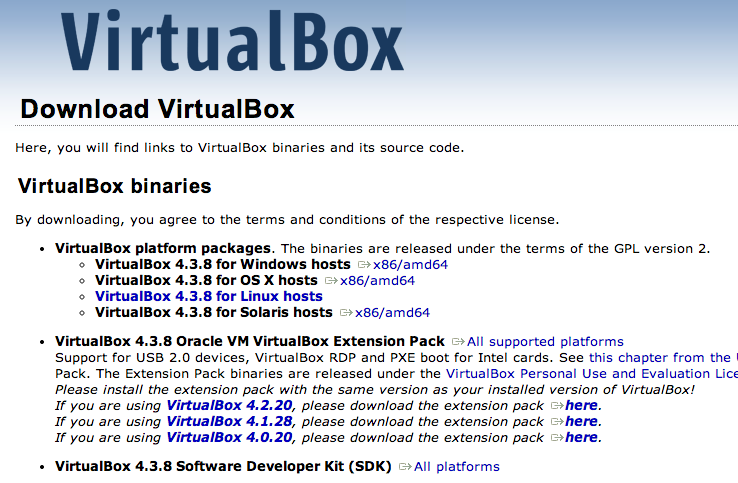
VirtualBox
VirtualBox is a free virtual machine app. It is required by the Genymotion emulator.
Click the link: VirtualBox 4.3.8 for OS X hosts -> x86/amd64
Double click the dmg file and follow instructions.
Genymotion
Genymotion is a virtual machine based emulator for Android. It not a Google product. It is unbelievably fast. It is fast enough to play arcade games on it. They have a wide variety of devices in the emulator library. My normal workflow is to build and test on emulators and once I am confident I will test on actual hardware. Their emulators are also nice when demo an app on a projector.
It is free for private use. You must be registered in order to download emulators.
Go to: http://www.genymotion.com/
To register. They will send a link to your email address in order to confirm it. Click the link and you are in.
Download the emulator from the download page
Double click the dmg file
Drag the Genymotion app to the application folder
Drag the Genymotion.shell app to the application folder
Double click the Genymotion app in your application folder to launch it
Click the Add button to download an emulated device
I would recommend initially downloading a Nexus 4 (phone).
You should now be able to build and deploy an Android app to the Genymotion device.

